

Client Situation
The amazing, hidden design features of Microsoft Word may surprise you. You can edit images, cut out image backgrounds, and much more. Watch the video tutorial below to discover the hidden design features of Word and avoid frustrations. Your real life situation is that you work for a company who is sponsoring a benefit event. You have been asked to design a color flier to promote the event. The budget is tight, and your boss doesn‘t want to pay an outside design firm. The only computer software at your disposal is Microsoft Word.
IMPORTANT: Please do not use any Adobe programs. Please do not start the 30-day free trial of any Adobe programs yet, or they will expire before we need them for later projects. You may only use Word for this project.
Preparation
Reading: Design with Color chapter of the Non-Designer’s Design Book.
Tools: Microsoft Word. No other software.
Image tips: How to find quality images online (How to find quality images online Transcript)
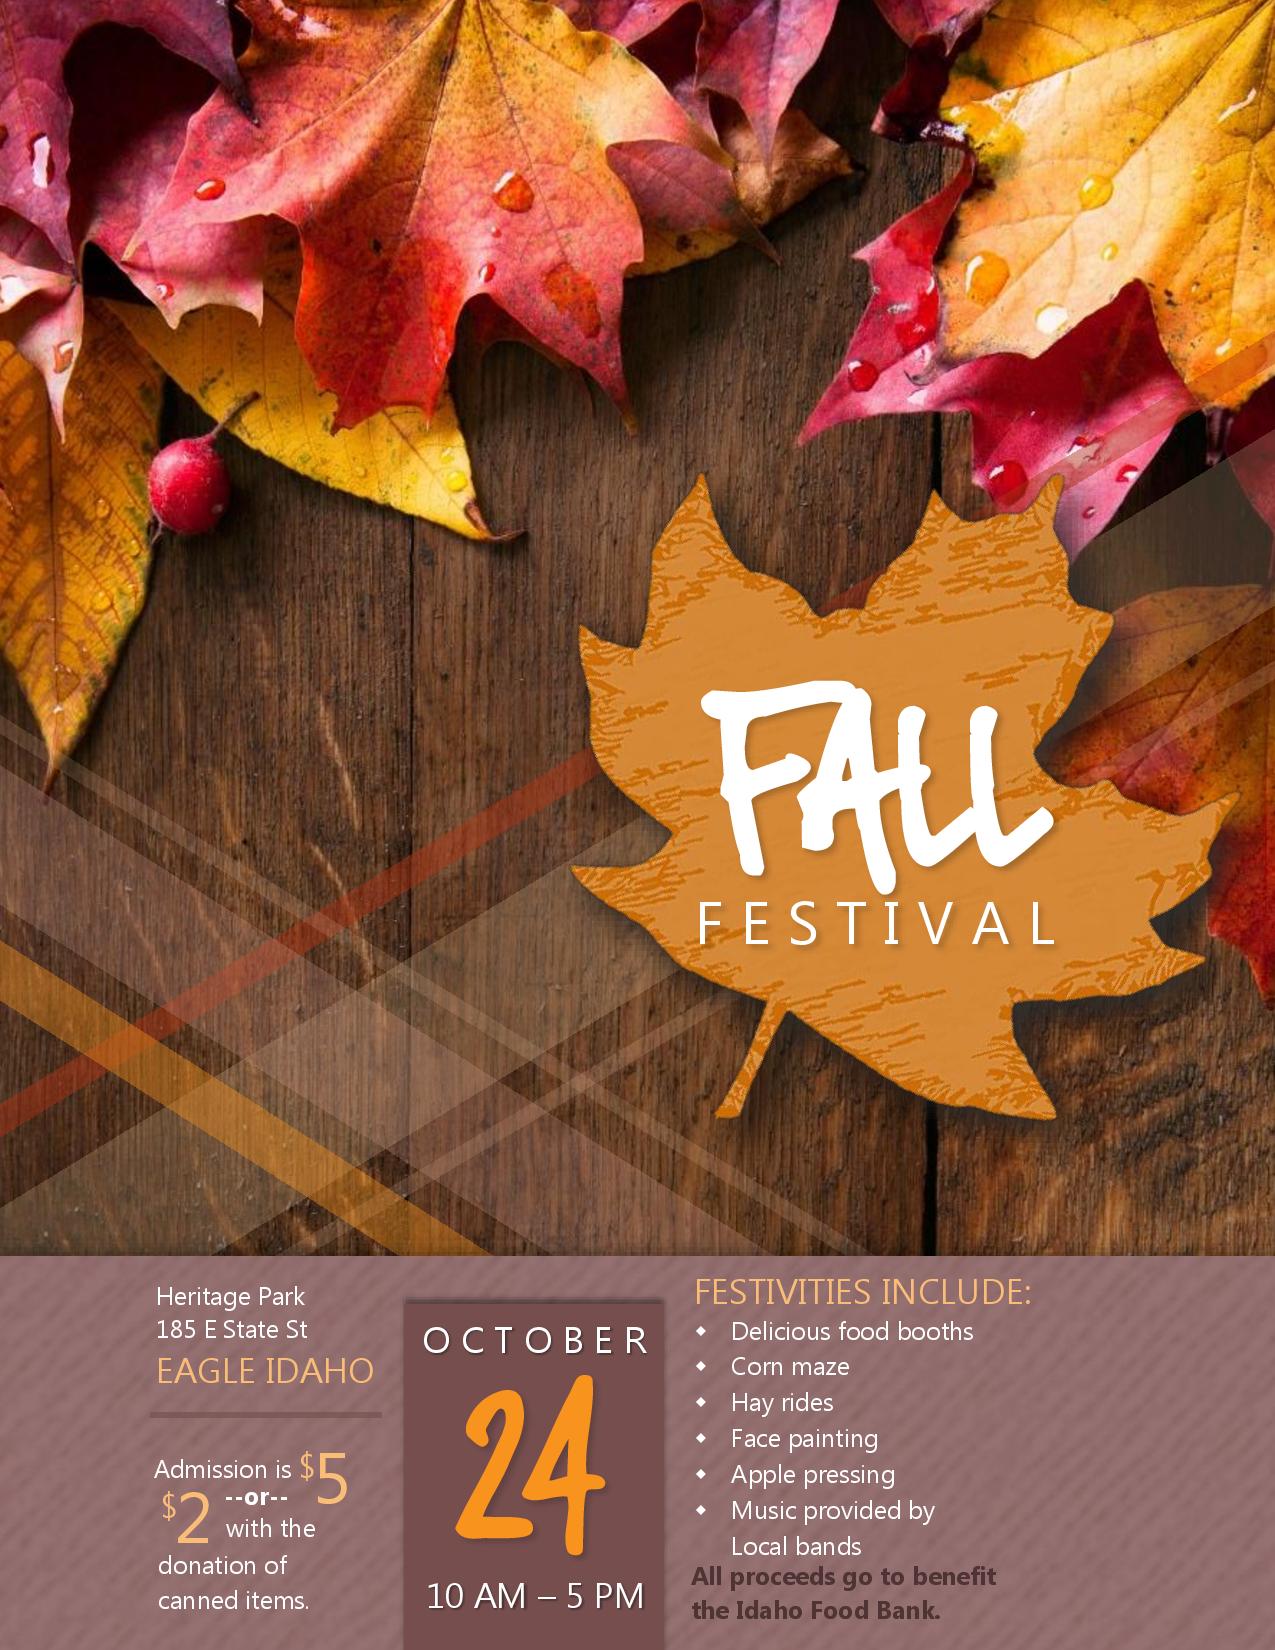
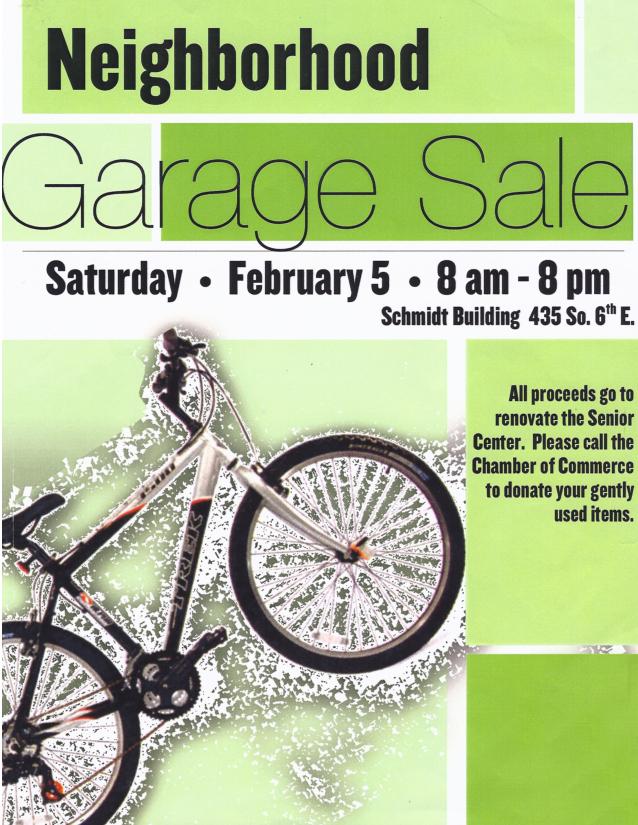
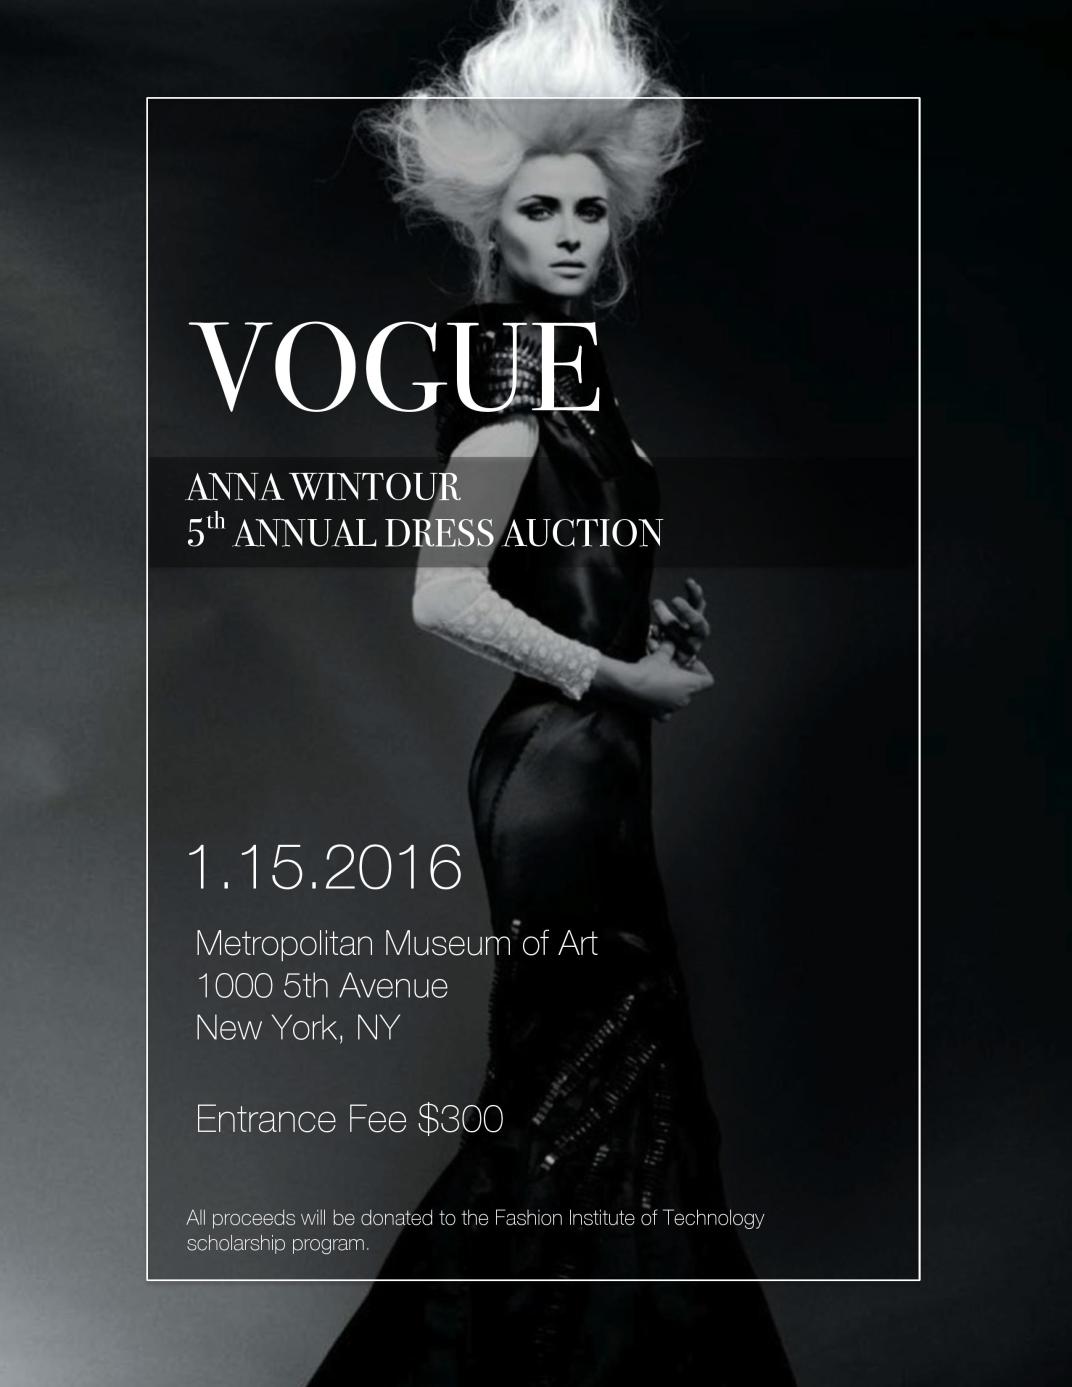
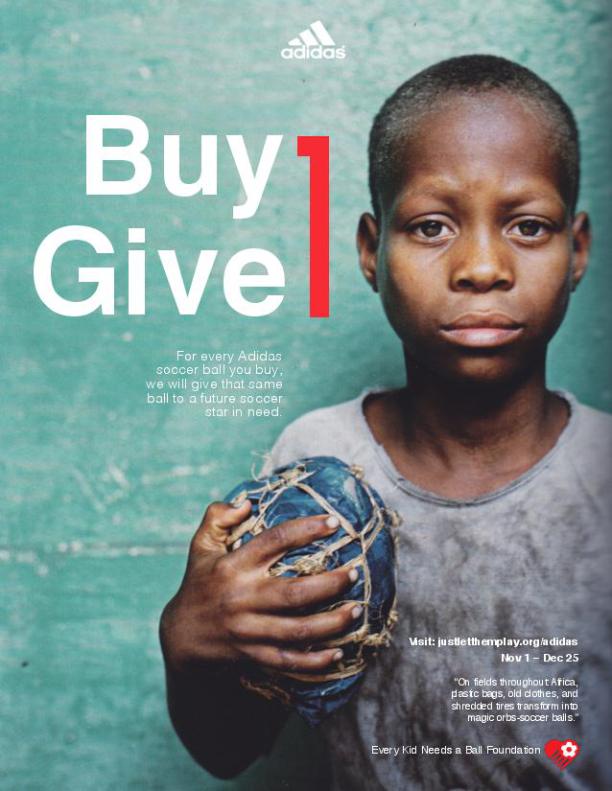
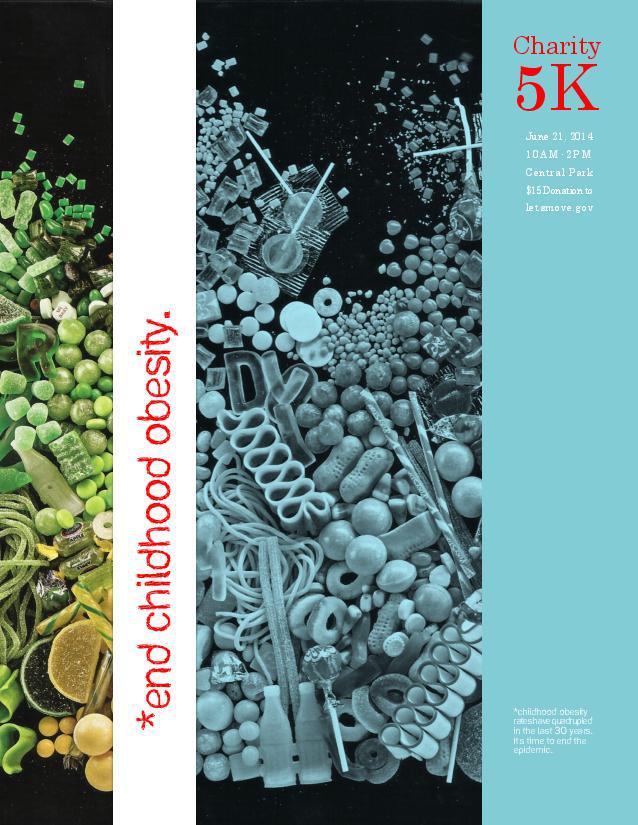
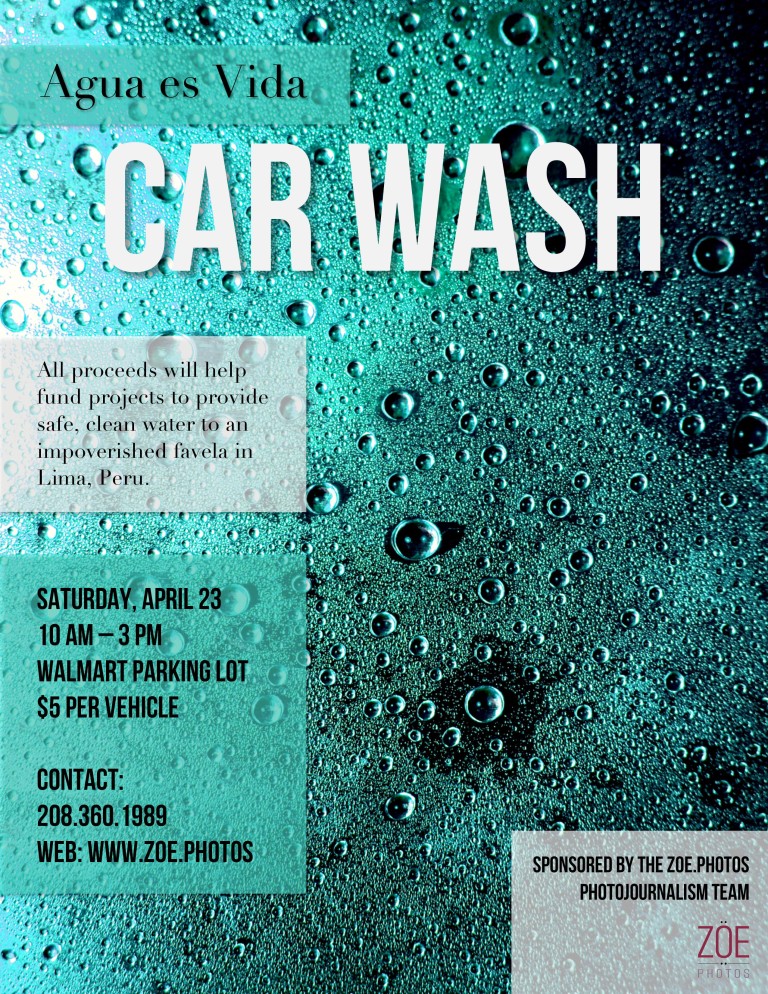
View: 5A Event Flier – Sample Blog Post
Instructions
- Layout and Content: Open a new document that is 8.5×11 or 11×8.5. Use the tips in “Free Images to use in projects” to find quality image(s). Use one typeface with varying weights, or two contrasting typefaces.
- Flier Elements: Include the following elements in your flier:
1. Color scheme.
2.Repeating graphic elements.
3. Each color in scheme should appear at least twice in layout: in the image, type, repeating elements, etc.
4. Large, eye-catching event title.
5. Event price, or some way to raise funds.
6. Benefactor and Beneficiary.
7. Date, time, and place.
8. Full-bleed design with narrow margins (1/8″ or .125″). - Critique Process – Find more details in Course > Critique Process Guidelines
1. Class Facebook Critique: Post jpeg or png by Monday 8:00pm MDST
2. Client Critique: Watch Instructor critique recording on Tuesday
3. Critique Report: Include in blog post: Who-How-What critique you received & list two students YOU critiqued. - Blog Post: Display two images of your project and information like this 5A Sample Blog Post.
File name: After your critiques, make final changes and save your final project PDF with this file naming convention: 5AJakeSpencer.pdf Note: WordPress does not display PDFs well and Word does not allow you to save your project as a JPEG.
So, convert your PDF to JPG to display in your blog:
• Go to this PDF to JPG converter. Select “Browse” and select your PDF.
• Choose excellent JPEG quality; Select “Convert PDF to JPEG” and download.
Also, insert a screenshot of your project in Word, as shown in the sample blog post. Google “How to screenshot on PC (or Mac)” to see how easy it is to find quick tutorials online.
Add Written process: Include Message/Audience/Color Scheme and color names; Critique Report paragraph (see above); link to image source; font name/category for title and copy. - Submission – Find more details in Course > Blog Post: Submission Instructions
1. Go to project submission and attach the PDF and SCREENSHOT of your blog post.
2. Then you will be able to insert a working HYPERLINK to your blog.
Tutorials
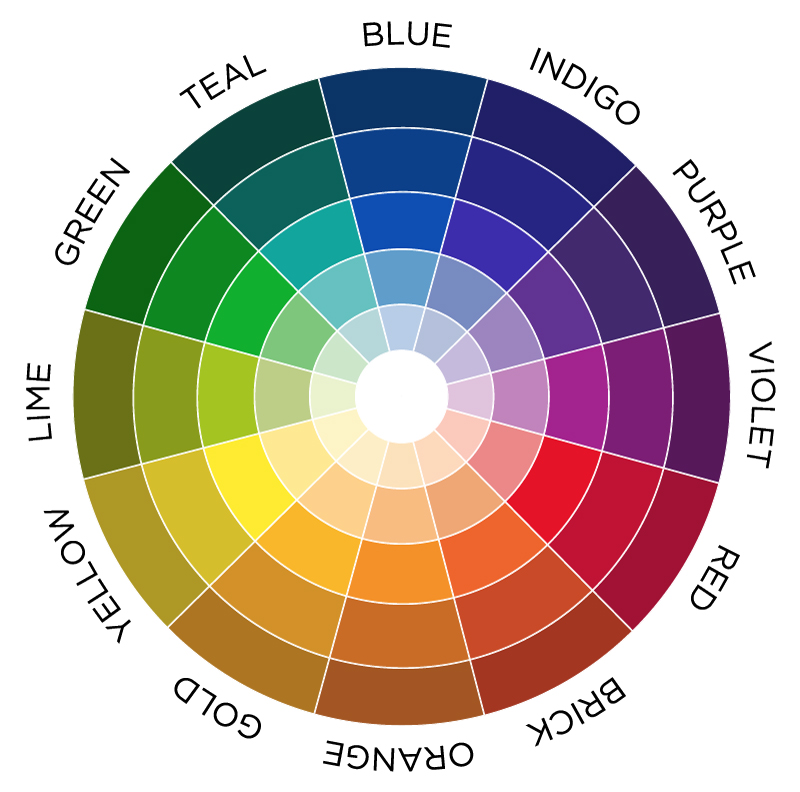
Tutorial: Picking a color scheme
- Click the below color wheel image and save it to your project folder.
- Place it in your document temporarily, to sample colors, and set up your color swatches (in Microsoft and Adobe programs).
Rubric
NOTE: Meeting the minimum requirements is “average” and constitutes an 80% or B- grade, according to the University Grading Guide. To receive a higher grade, students should excel.
√ Layout: Size: 8.5×11 or 11×8.5; Quality images; Full-bleed design; Design principles; No tangents or crowded elements; Adequate white space; Repeating design elements. Each color in scheme appears twice.
√ Typography: Contrasting typeface(s) (no more than 2); Title; Fundraiser; Benefactor & Beneficiary listed; Date–Time–Place; Full-bleed design with narrow margins (1/8″ or .125″). Typography Rules applied.
√ Blog Post: Two images displayed at Large size; images are clickable; Quality JPEG of project; Quality screenshot of project in Word; Written process: Message–Audience–Colors & Scheme listed; Critique Report: Who, What and Changes. Links to image source(s); Font name/category for title and copy.
√ Submission: Screenshot of entire blog post; PDF of project; working hyperlink to blog post;
CAUTION: your assignment is not complete until you submit a link to it here. However, you are allowed a one-time extension, if you choose to use your mulligan. (See syllabus). We check your blog post for completion right at the deadline, so please do not add things after submitting your link, until it has been graded.