
Client Situation
You have been hired for an internship with LDS Church Magazines and your first project is to write and design a two-page magazine spread for the Ensign or New Era. This project could very well launch a new career if you combine good writing skills with the design principles to create an engaging piece that will communicate your message to the target audience. Your spread may be an inspiring personal experience, or an instructional infographic-style article.
In step 1, you prepared your content and sketches. Now it is time for step 2 where you create a shape map in InDesign and start refining your layout. The draft version should be 90% done and include 100% of the required elements. If you have a more complete draft, you will get much better critique. Then you will make final changes, print and create a video of your project for step 3.
Preparation
Optional: Meeting(s) with a BYU-I Writing Center tutor.
Instructions for Step 2: Magazine Spread Draft Critique
Be sure you have completed step 1 before starting this step.
SHAPE MAP:
Watch the Magazine Spread video tutorial Part 1 (Shape Map) (transcript) to match your best sketch. Include a note with your Color Scheme in your Shape Map. Go to File>Export and save the shape map as a JPEG at 60ppi.
Be sure to include the following elements in your layout (same as your sketches):
1. Large eye-catching title, with one or two dominant “theme words.”
2. Text boxes filled with placeholder text.
3. Image shapes.
4. Graphic elements.
5. Color notes.
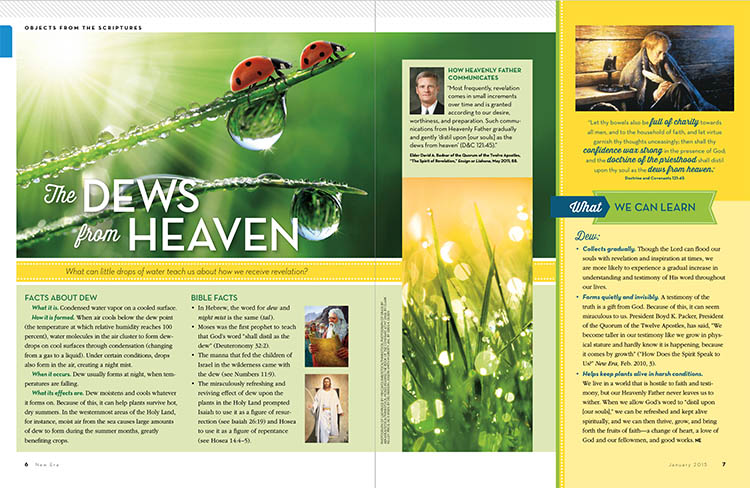
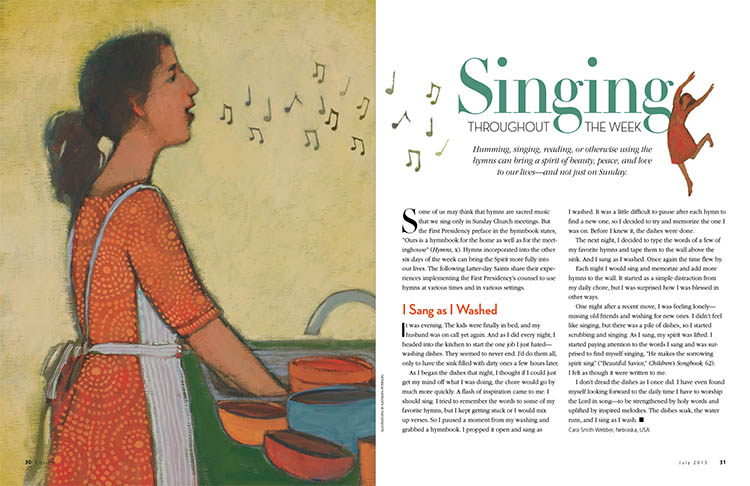
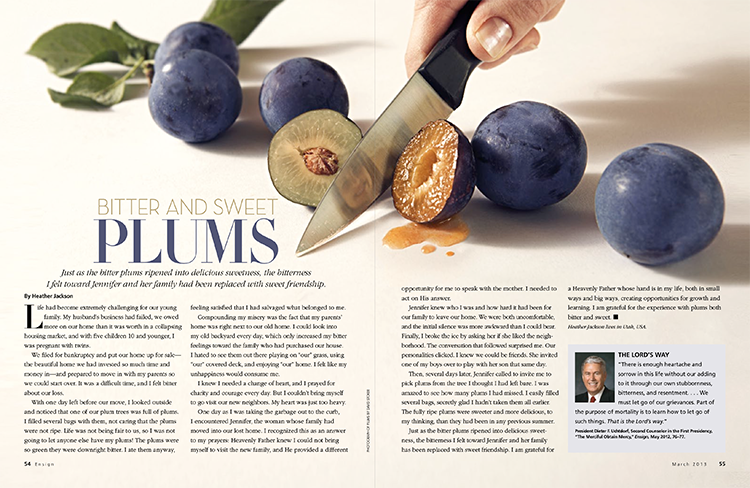
LAYOUT: Open your shape map in InDesign and use it as a guide to finalize your layout. Insert your title, images/illustrations, repeating graphic elements. Replace your placeholder text with your own original copy. Follow this Magazine Spread video tutorial Part 2 (transcript) for layout and Image Prep tips. Be sure to add a narrow, subtle line to show the center line of your two-page spread, unless you have a hard image line dividing the two pages. (See examples above.)
TYPOGRAPHY: Choose a legible body copy typeface from an Oldstyle or Sans Serif category. You do not need to use the same fonts as the Church magazines, but you do need to follow the typography guidelines from this course. Choose a title typeface and make sure it contrasts with your body copy. Occasionally an additional typeface may be used in the title only, but check with your instructor if you choose this more advanced technique. A third font can work, if the title is treated as a type of logo, as with many Church magazine articles.
IMAGES: Use Photoshop for image effects then save them as a .psd (Photoshop document). Then place them in InDesign to create a feathered, faded image edge, transparent background, or clipped image for text wrapping. See Magazine Spread video tutorial Part 2 (transcript) for tips on image prep.
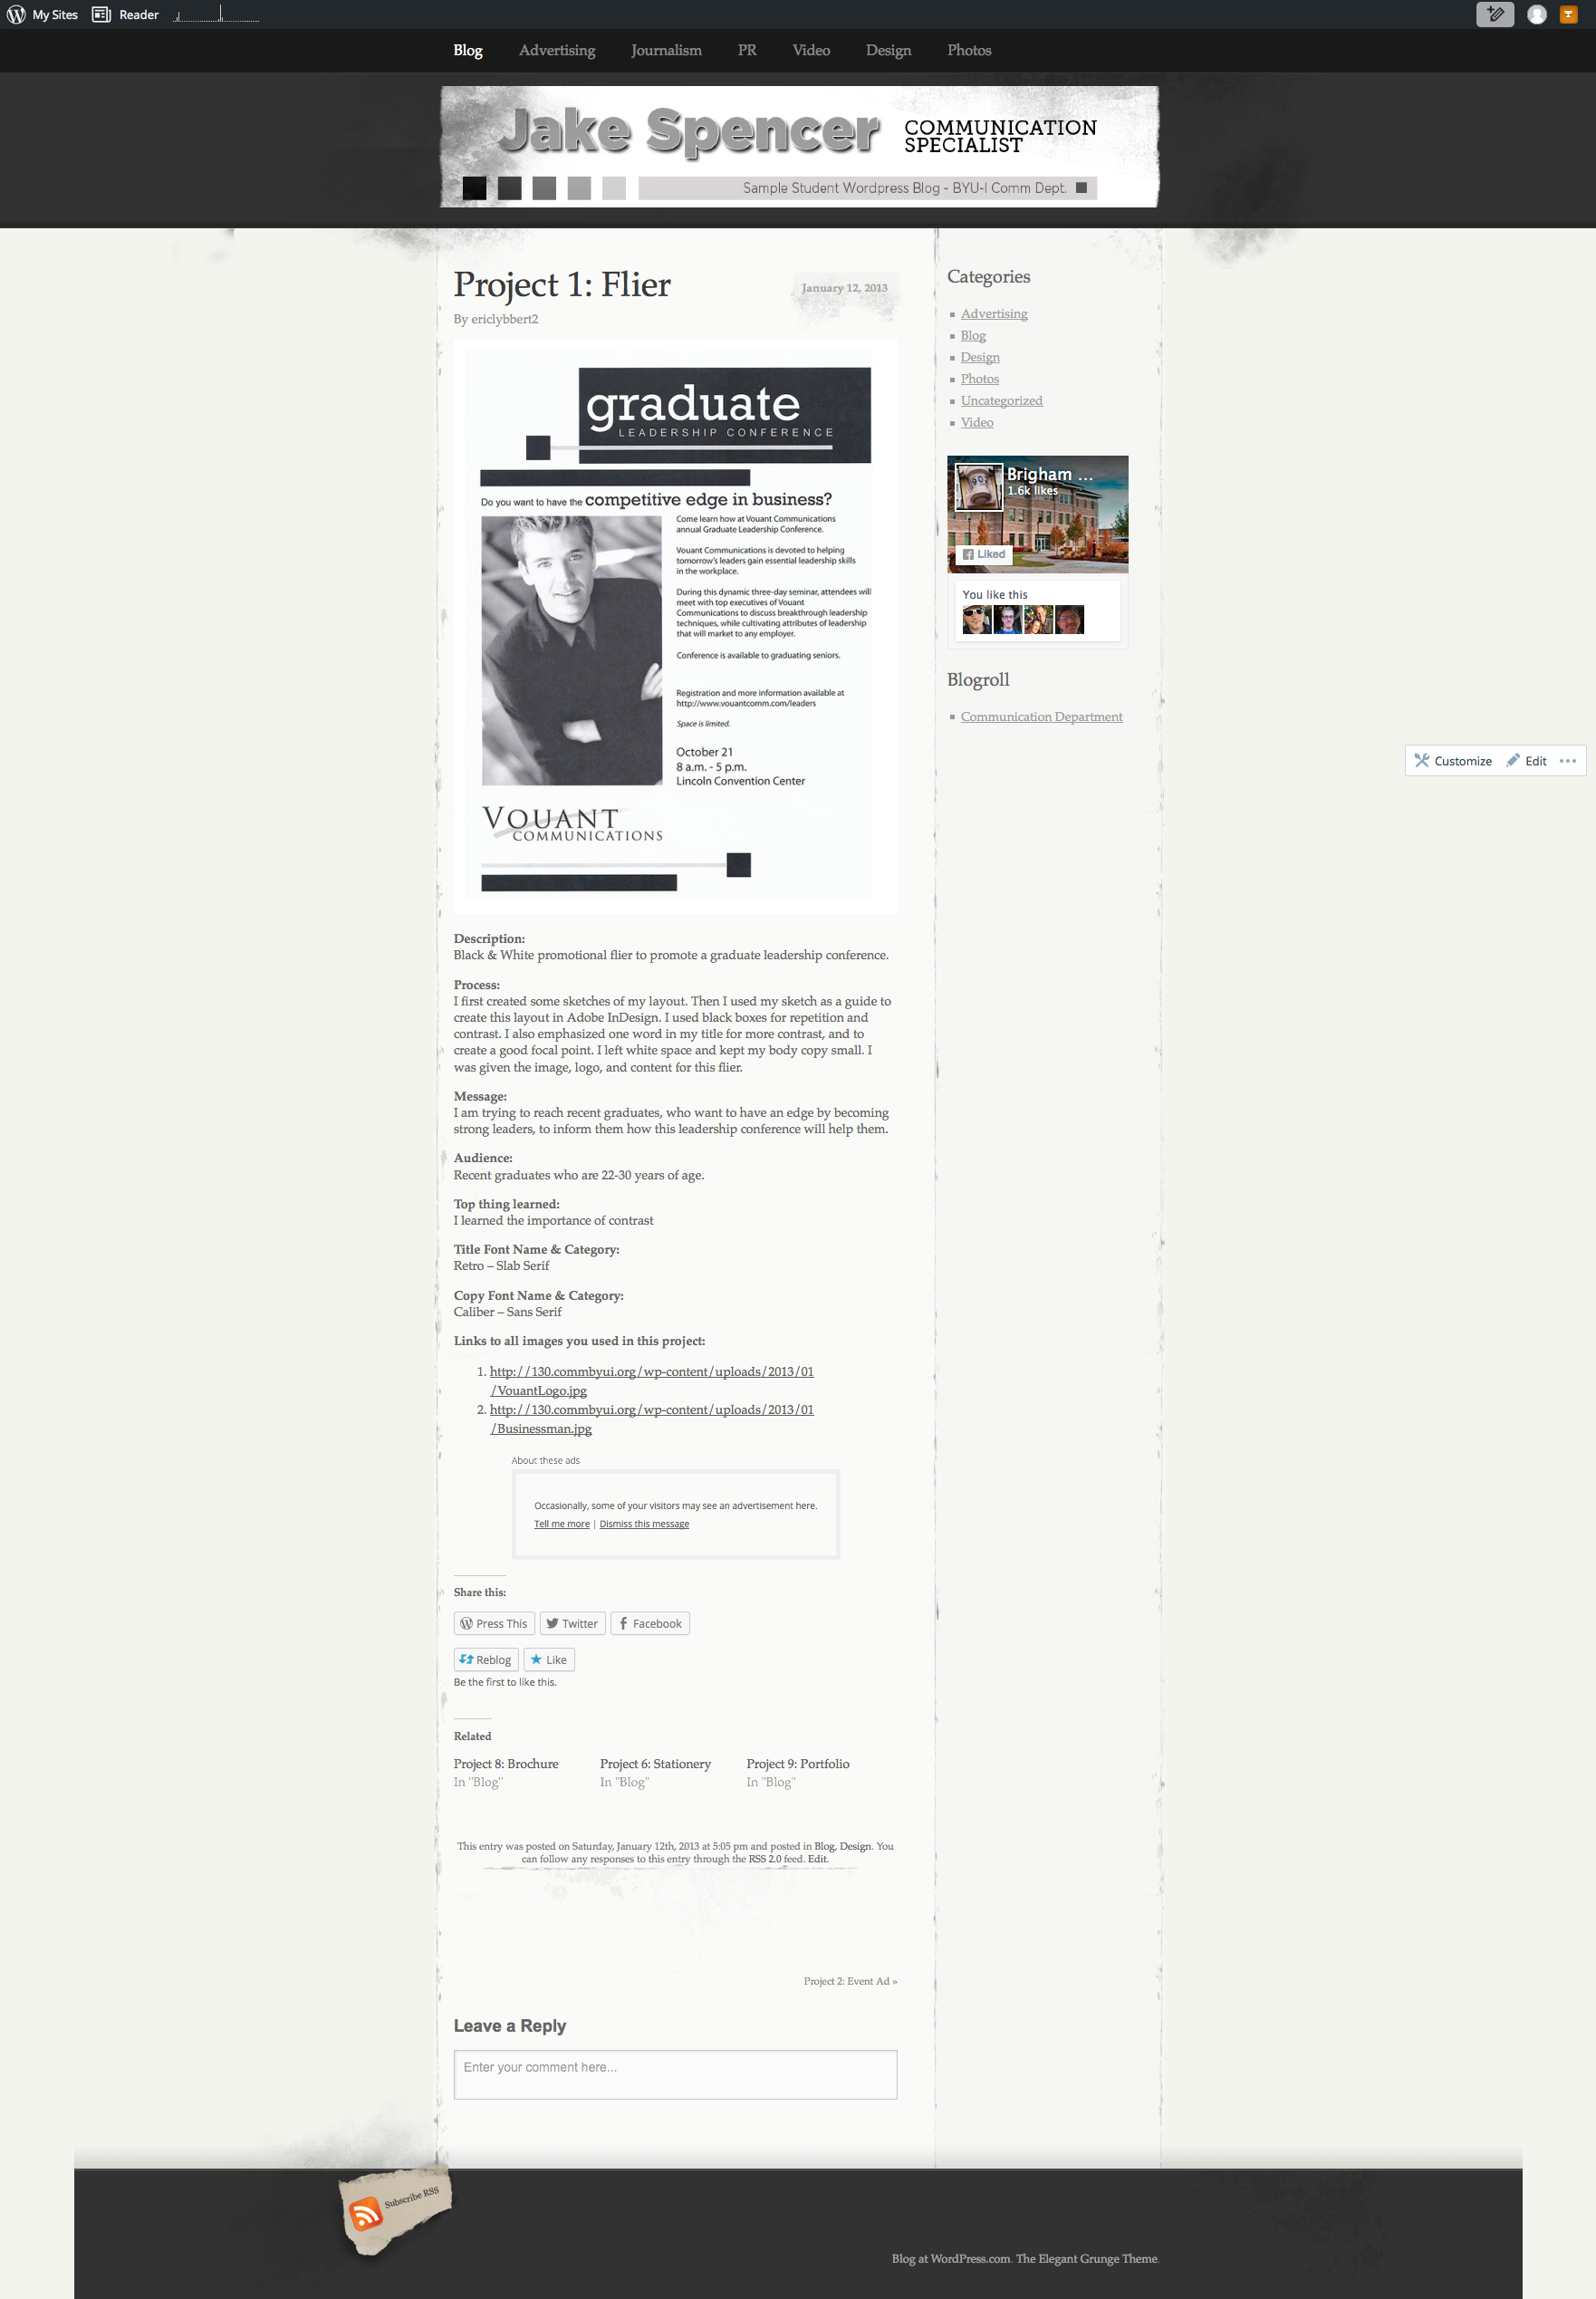
BLOG POST: Create a new blog post that matches this Sample Blog Post (except for the video and critique paragraph that will come later). Include an introductory paragraph about the magazine spread project. Include your layout at the top displayed at Large size, with thumbnails below of your best sketch and shape map. Be sure the thumbnail images are clickable so someone could look at them larger. Include the following information: Image Sources; Typeface(s) and Category(ies). Insert the JPEG of your layout. Submit a link to the blog post in this assignment.
SUBMIT LINK AND BLOG SCREENSHOT TO I-LEARN:
When your assignment is complete, click “Open” on this page and submit the following:
NOTE: Do not submit until everything is complete. Once you submit, be sure NOT to change anything on your post, until after it is graded.
Use one of these methods to capture a screenshot of your entire blog post:
A. Go to WEB CAPTURE:http://web-capture.net/: Copy the full URL to your blog post, enter it and hit “Capture Web Page.” Note: if the servers are taking too long, try Awesome Screenshot instead.
Once installed, navigate to your blog post, click the Awesome Screenshot Icon, and choose “Capture Entire Page.” After it generates the page, hit “Done” and then save the image as a file.
NOTE: Your completed screenshot should show the entire blog post, like this example (click to enlarge):
After submission of step 2, proceed to step 3: 12B Magazine Spread Project (Print & Video).
Rubric
NOTE: Meeting the minimum requirements is “average” and constitutes an 80% or B- grade, according to the University Grading Guide. To receive a higher grade, students should excel.
√ Layout: Size: 18×12; quality images: long side 1024 px when on your blog.
√ Typography: two contrasting typefaces; title; .5 inch margins around type.
√ Requirements: 400-800 of your own, original words (no more than 75 quoted words); at least two images/illustrations; Typography Principles; Design Principles.
√ Blog Post: three images displayed at Large size; images are clickable; quality JPEG of project; quality image of the shape map; quality image of the sketches; written process: 5+ sentences; message and audience listed; links to image source; font name/category for title and copy.
CAUTION: your assignment is not complete until you submit a link to it here. We check your blog post for completion right at the deadline, so please do not add things after submitting your link, until it has been graded.